Why Your Photos Look Fine… Until You Get Home (And How to Prevent It)
There’s a moment every photographer experiences.
You get home from a shoot. You load your images onto a large screen. And suddenly… something looks off.
A bright distraction on the edge.
A horizon cutting through someone’s head.
Focus that isn’t quite as sharp as you thought.
Exposure compensation still dialed in from the last setup.
And by then, it’s too late.
Over the years, I’ve learned that most of these mistakes don’t happen because we don’t know better. They happen because we leave too quickly.
So before I pack up at any location, I run through a simple 7-point checklist. It takes less than two minutes and has saved me more times than I can count.
Here it is.
1. Check Your Diopter
Your viewfinder has to match your eyesight.
If the diopter isn’t properly adjusted, the image may look sharp to you — even when it’s not.
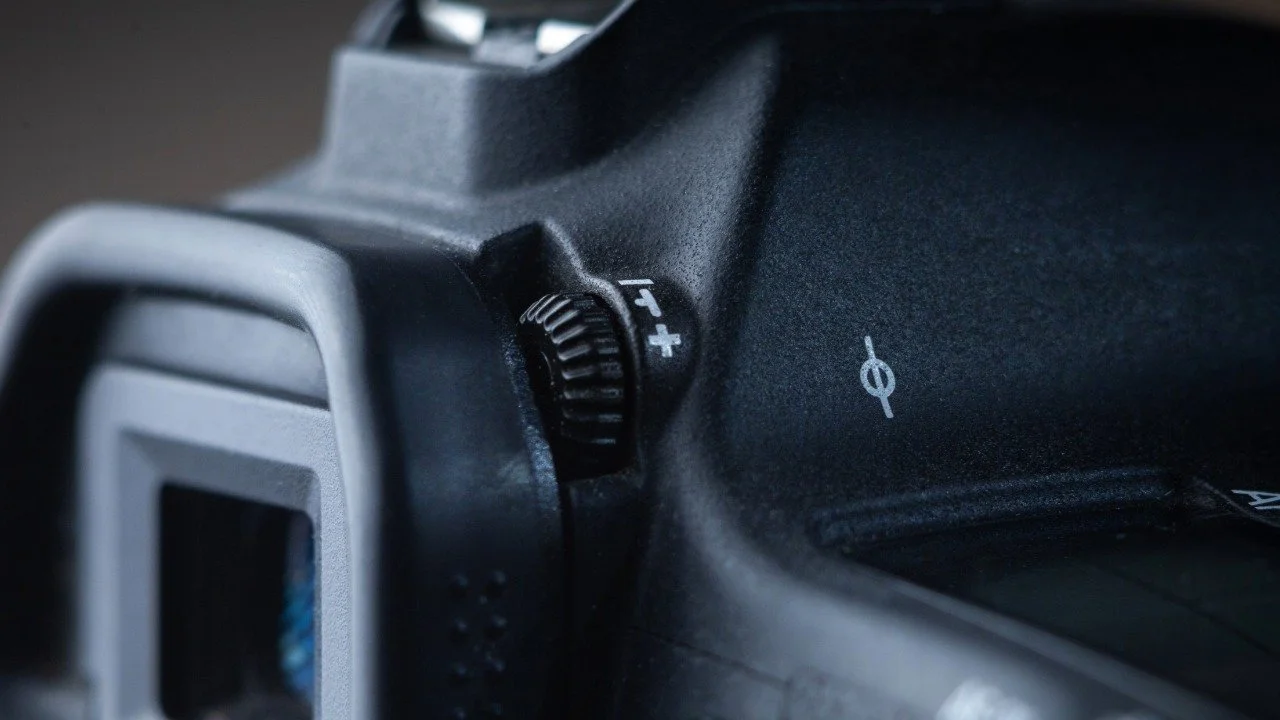
Diopter Dial
I haven’t met a camera without one. And they are easy to bump.
Before you start shooting:
Look at the text or focus points in the viewfinder.
Adjust the diopter until those look razor sharp.
Recheck occasionally, especially if someone else used your camera.
If your eye isn’t calibrated, nothing else matters.
2. Reset Exposure Compensation
This one catches a lot of people.
You dial in +1 or -1 for a backlit situation… and forget to reset it.
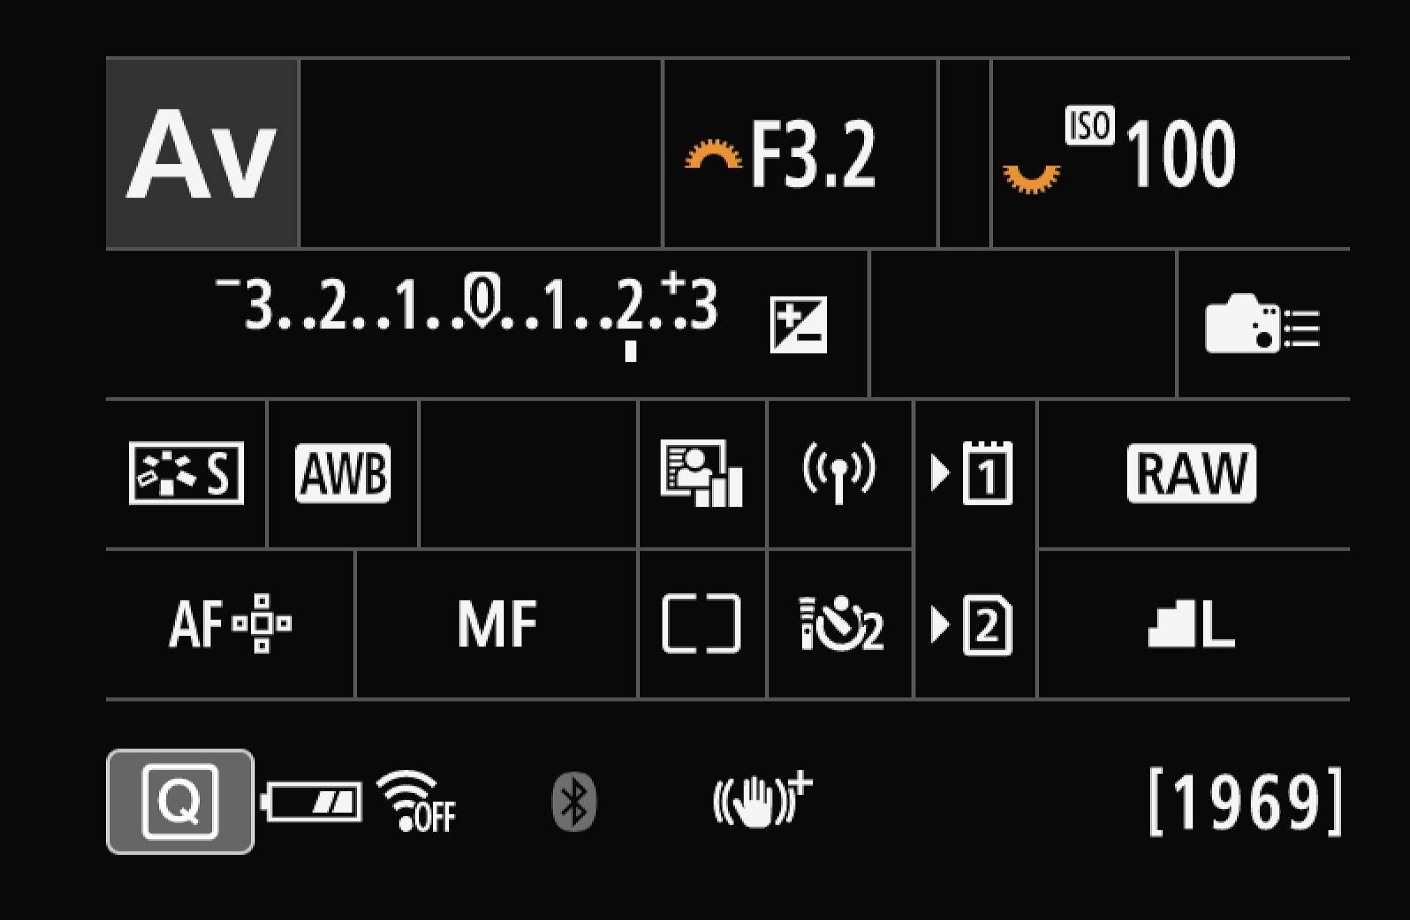
Exposure Compensation
In this image you can see the Exposure Compensation is set to a +2 and will over expose by two stops.
Before leaving:
Confirm exposure compensation is back at zero (unless intentionally set).
Double-check your meter.
A small dial change can quietly ruin an entire series.
3. Trust the Histogram (Not the LCD)
The LCD lies.
Its brightness shifts depending on ambient light. In bright sun, images can look darker than they are. In shade, they can look brighter.
Instead:
Check your histogram.
Watch for clipped highlights.
Confirm shadows are where you want them.
The histogram shows the truth. The LCD shows a suggestion.
4. Zoom In and Confirm Focus
This is the one most photographers skip.
After taking a key shot:
Hit playback.
Use the magnify button.
Zoom to 100%.
Check critical focus (especially eyes in portraits).
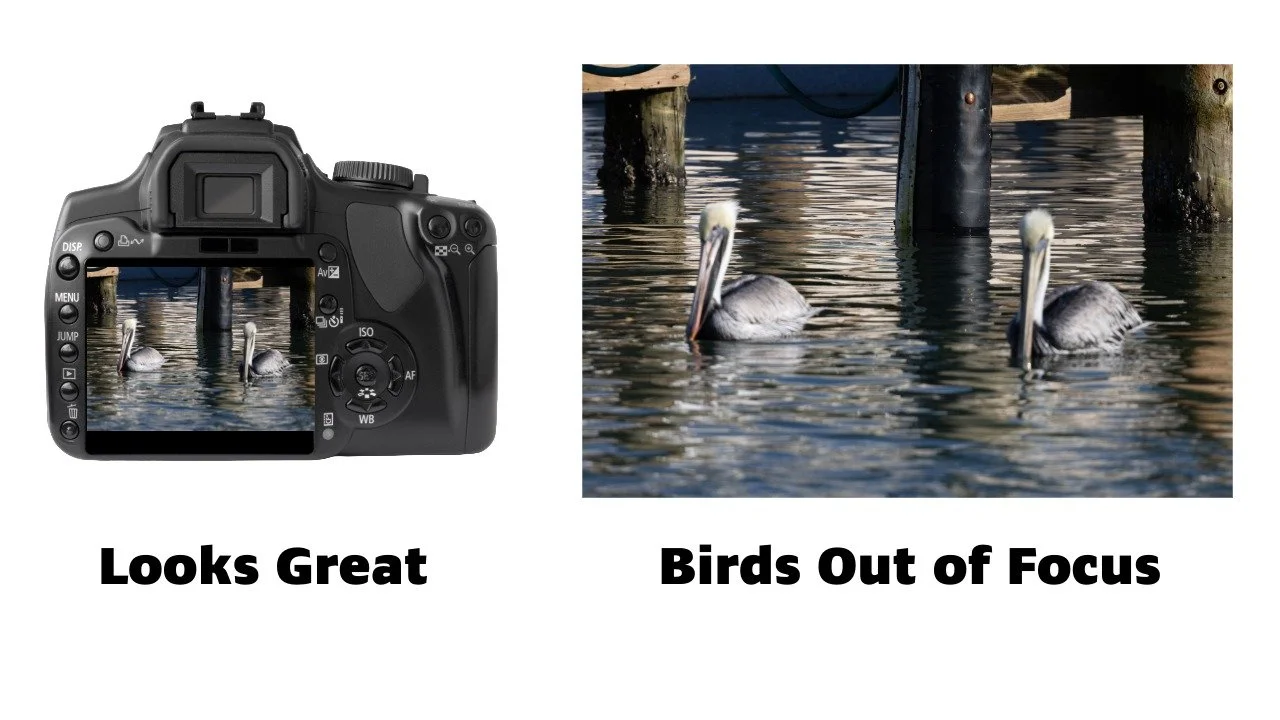
What looks great on the LCD may be blurry on your compurter or prints.
Don’t just glance. Verify.
If you don’t zoom in, you’re guessing.
5. Scan the Frame Edges
Your brain locks onto the subject.
Your camera records everything.

Look at All Your Edges
In the photo on the left there is a distraction across the top and a dead piece of grass crossing, but not making it outside the photo.
The photo on the right it is cropped tighter to hide the noise at the top and make the grass looks like it goes all the way through the image
Before packing up:
Look at the edges of your frame.
Check for bright distractions.
Watch for cropped fingers or awkward cutoffs.
Look for poles or objects merging with heads.
Most edge problems are easy to fix — if you see them in time. Don’t rely on editing in post to fix all the issues.
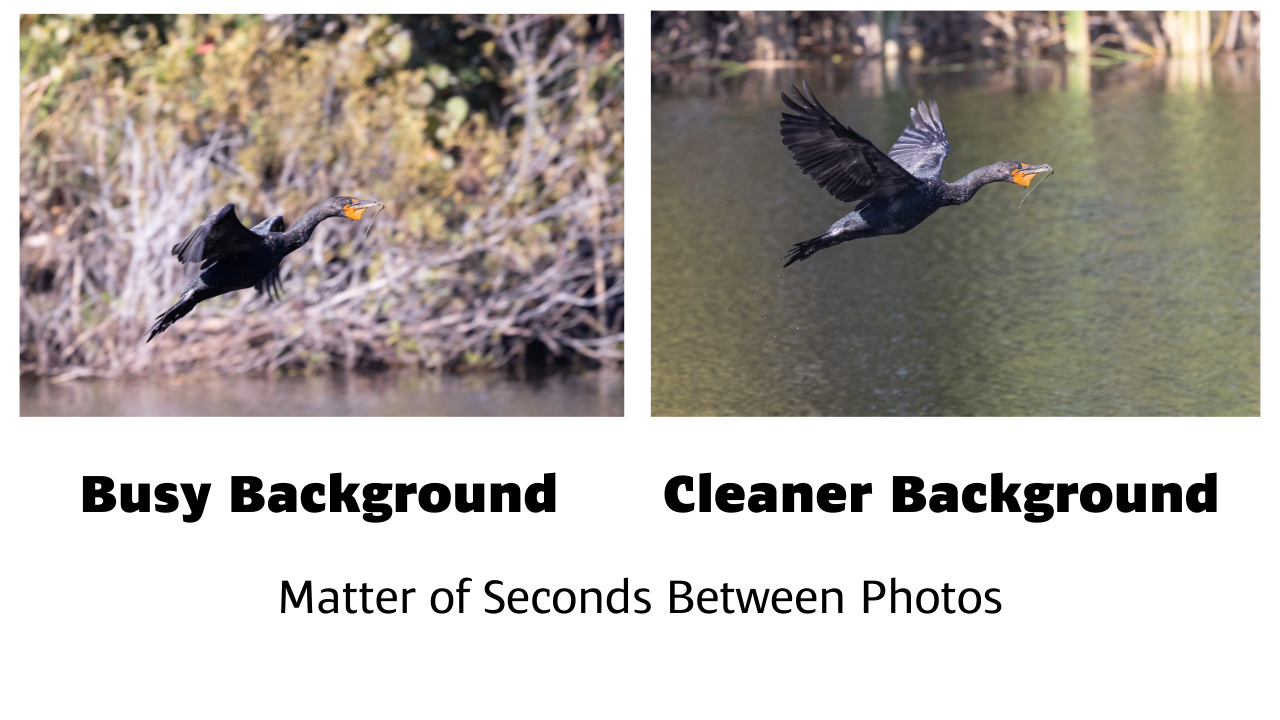
6. Check the Background
Background issues are subtle on a small screen.
Look for:
Clean subject separation.
No horizon lines cutting through heads.
No mergers.
No clutter pulling attention away.
Often a small step left or right fixes it.
This is the same bird if you zoom in you can see a piece of grass or stick to build a nest. It is much easier to see that detail on the photo on the right.
7. Take One Safety Shot
Professionals take insurance.
Before leaving:
Slightly adjust framing.
Try a small exposure tweak.
Shift your focus point slightly.

What is a Safety Shot?
These are shots that you take incase the scene changes suddenly. This is common in wildlife photograpy. I was not close to this alligator, so that wasn’t the “Safety” here. I took it first incase it went in the water. Turned out to be the best of the shots.
Digital frames are free. Regret is expensive.
Final Thoughts
Good photography isn’t just about taking the shot.
It’s about finishing the shot before you leave.
If you’d like a printable version of this checklist to keep in your camera bag, click the button below.