How to Create a Custom Menu on Your Canon Camera (Step-by-Step Guide)
If you’ve ever scrolled endlessly through your Canon camera menu trying to find one simple setting, you’re not alone.
The menus are powerful — but they’re long. And when you're shooting, the last thing you want to do is dig through pages of options just to format a card or change a setting.
The good news?
You can create your own custom menu.
You can name it whatever you want — and add the settings you use most — so they’re always one click away.
In this post, I’ll show you exactly how to set it up.
Why You Should Create a Custom Menu
A custom menu allows you to:
Access important settings faster
Reduce time spent scrolling
Personalize your camera to match your workflow
This feature has been available on many Canon models going all the way back to the T2i and up through newer more modern.
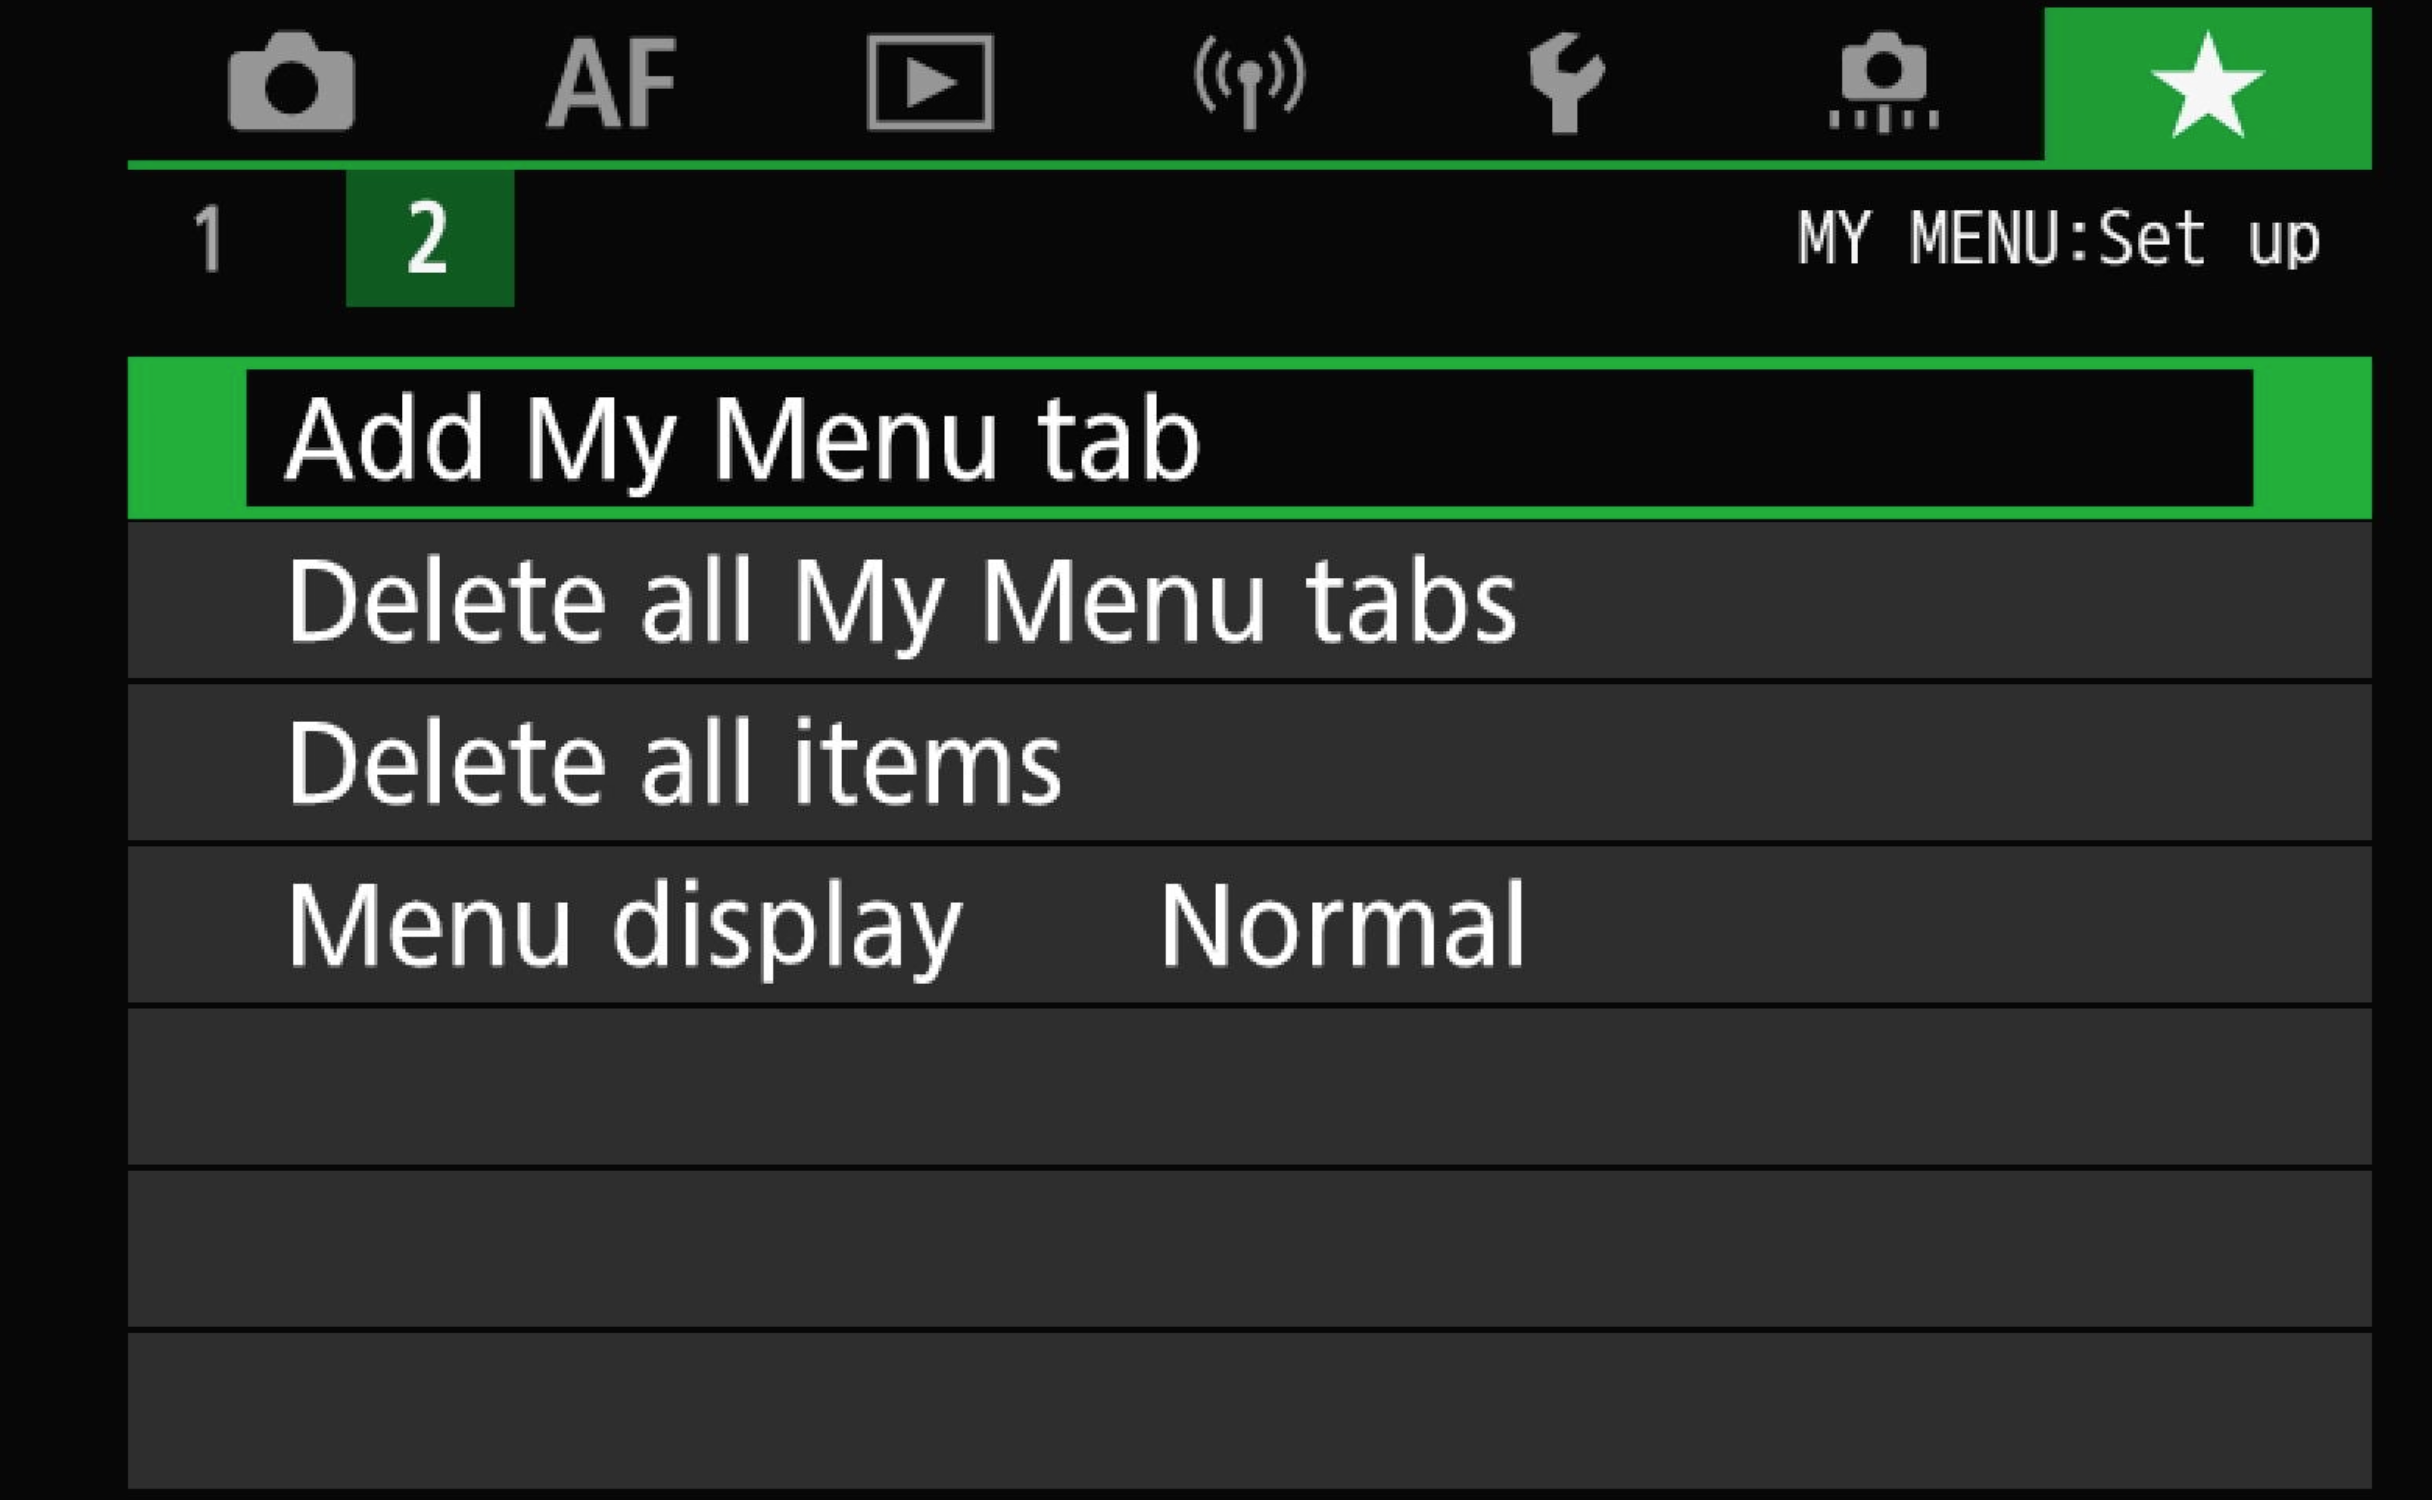
Step 1: Go to the “Star” Menu
On the back of your camera:
Press the Menu button
Scroll to the left until you see the Star (My Menu) tab
This is where you can build your personal menu.
Step 2: Add a New Menu Tab
Select Add My Menu Tab
Press OK
Now you’ll see the option to configure it.
Step 3: Rename Your Menu
Scroll down to Rename.
You can keep the default name (“My Menu”), or personalize it. I named mine Doug.
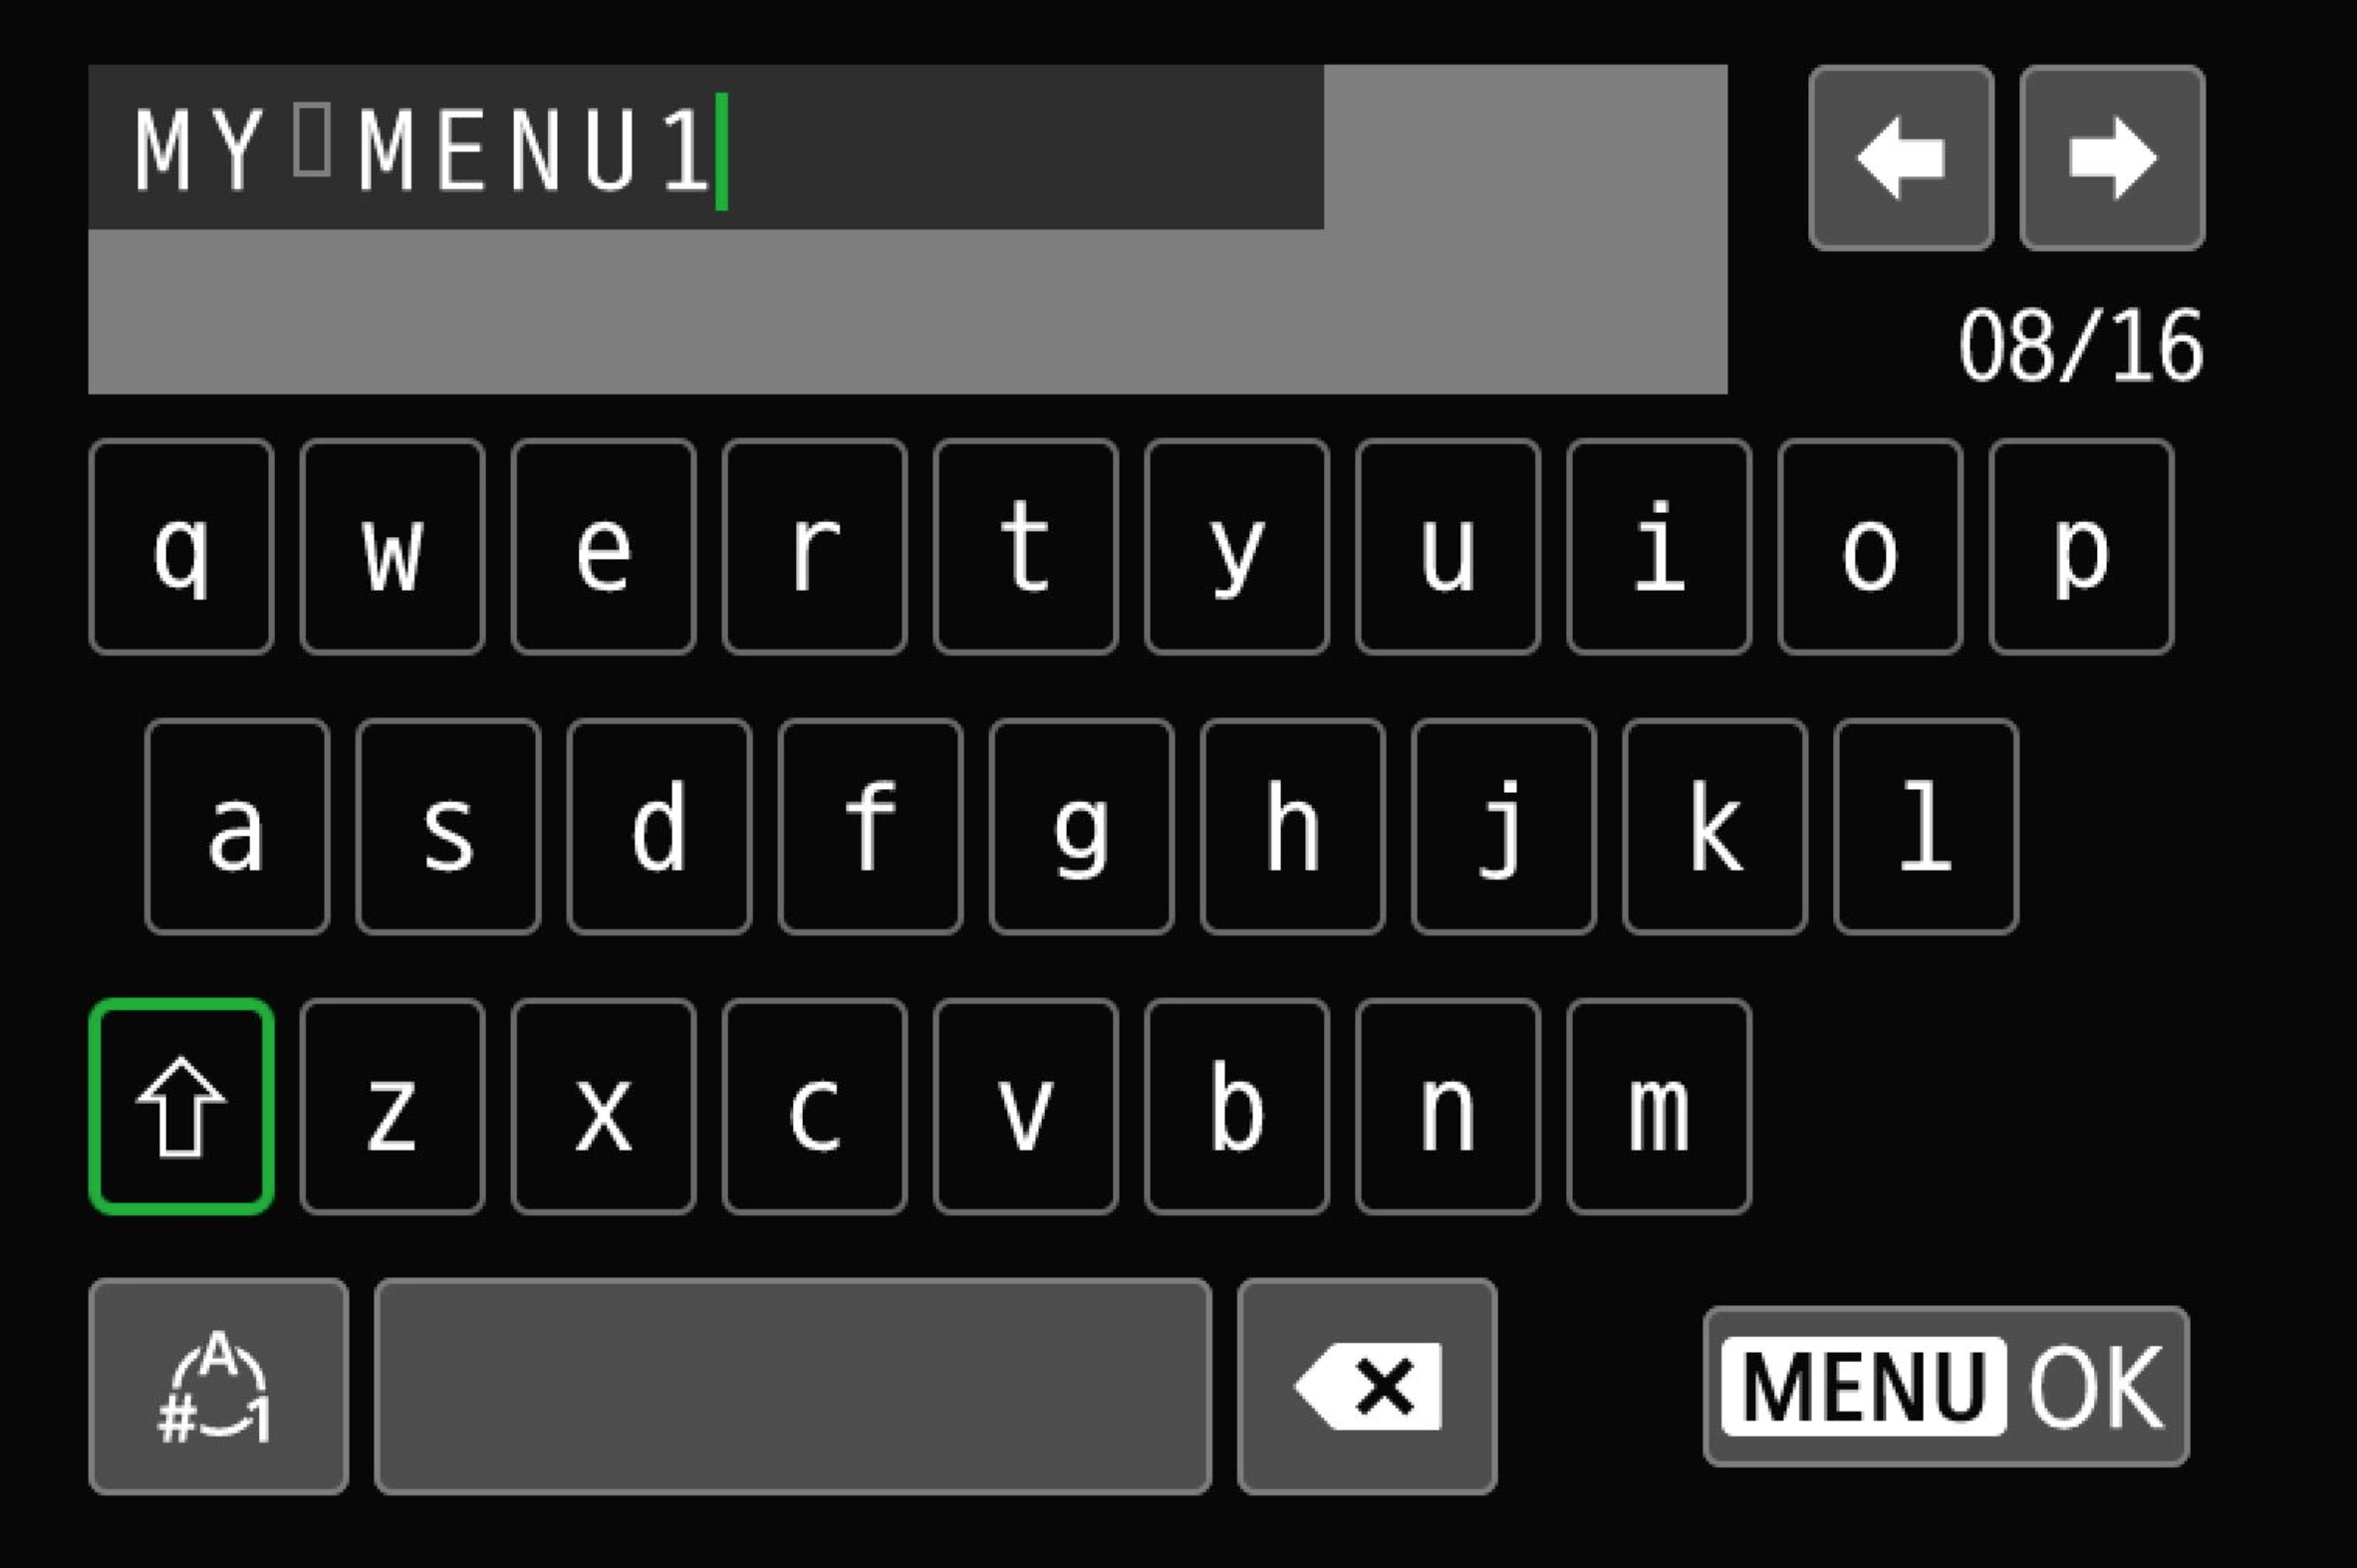
To Rename
Scroll to reach the backspace button
Press Set to erase the existing name
Enter your new name
Press Menu
Make sure you select OK (or your changes won’t save)
Now your custom menu has your name on it.
Step 4: Add Items to Your Menu
Now let’s add a setting.
Select Configure
Choose Select item to register
You’ll now scroll through all available menu items.
These are not listed alphabetically — they appear in the same order as your camera menus.
For this example, I recommend adding Format (found under the wrench menu).
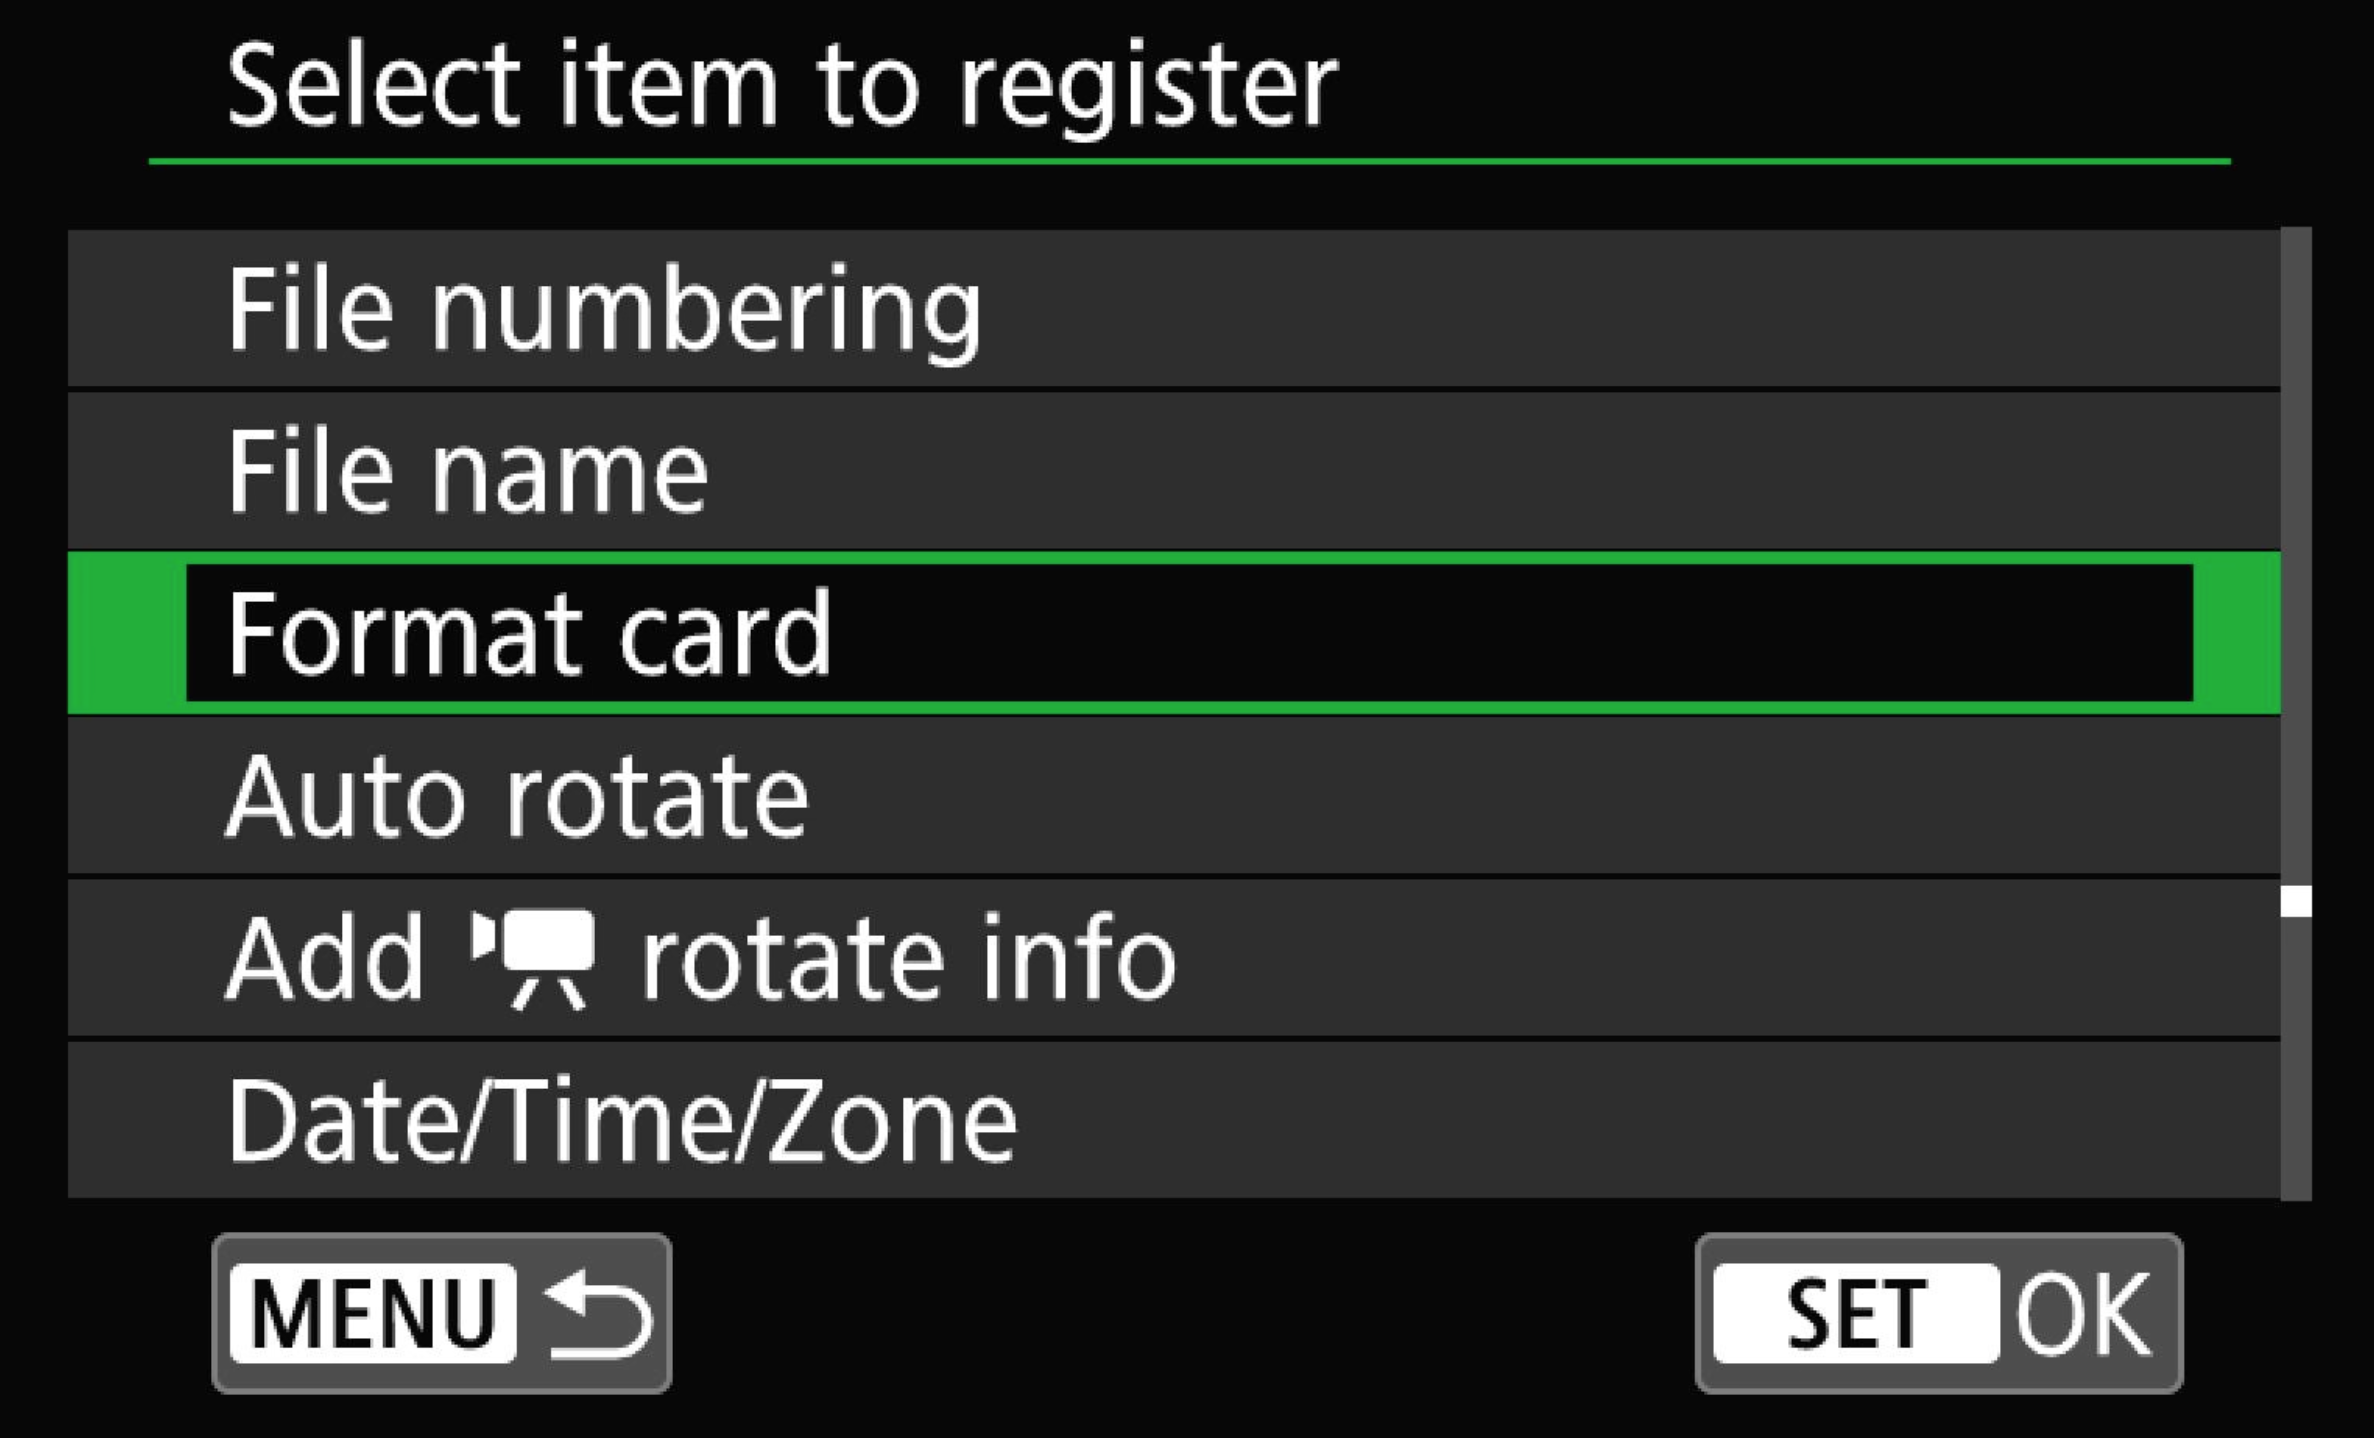
Format will be far down on the list
Once you find it:
Press Set
It will gray out (which means it’s added)
Press Menu to go back
You’ll now see Format listed in your custom menu.
That’s It
You now have a personalized menu with your most-used setting ready to go.
No more digging.
No more guessing.
Just quick access to what matters.
Watch the Full Walkthrough
If you’d like to follow along step-by-step on screen, I walk through the entire process in this video:
👉 Watch here: YoutTube